Print labels and edit many toys at once
Label a batch of new toys, or change many toys in one go instead of one by one.
Who can do this: coordinators and admins.
Steps
Print labels
- In the sidebar, choose Toys. On the Catalogue tab, find the toys you want (for example, use the Drafts view for new ones).
- Tick the box on each toy's row. A selection bar appears.
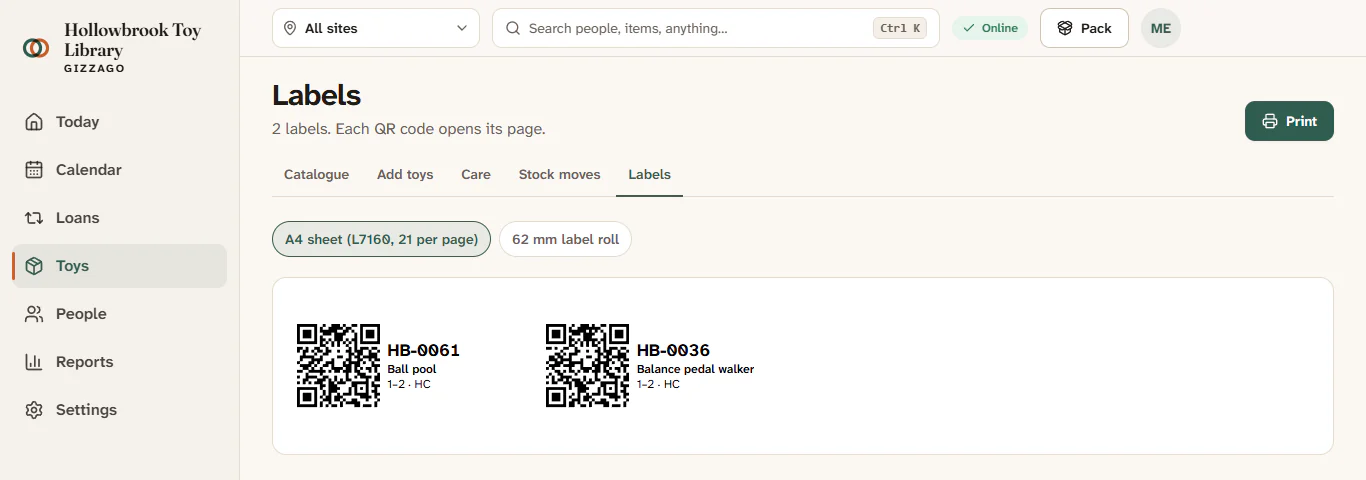
- Press Print labels. The Labels page opens with one label for each copy.
- Choose the format: A4 sheet (L7160, 21 per page) or 62 mm label roll.
- Press Print, and choose your printer.
What you'll see
Each label has a QR code, the code (for example HB-0231), the toy's name, its age, the number of pieces and a mark for its home site. Scanning the QR code with a phone opens the toy's page in your public catalogue.
You can also print labels from:
- a toy's page: Labels in the header;
- a copy's page: Label;
- the To catalogue queue: Print label on a row.
The Labels tab on its own says Choose what to label until you pick toys.
Edit many toys at once
- On the Catalogue tab, tick the toys you want to change.
- In the selection bar, press Edit.
- In the panel, change only what you need. Every setting starts at Leave as it is:
- Status: Live, Draft or Archived.
- Category (replaces the current ones).
- Members can reserve.
- Show on the website.
- Press Update 3 toys (the number changes).
What you'll see
A message such as "3 updated", and the catalogue list shows the new status. The change is kept in the audit log.
Tips
- Labels made for A4 sheets print on standard L7160 label paper. Check your printer's settings are at 100% (not "fit to page") so the labels line up.
- When staff scan a label's QR code while signed in, they also see Return this and Lend this, which open the desk of the session that is running.
- Choosing a new category in bulk replaces the toys' existing categories. To add one category to a single toy, use Edit on its page instead.